
We know that India is the most populous country in the world. India is fighting global environmental problems like urban heat island effects, extreme Air pollution in major cities, and biodiversity losses. Now, in this scenario, the Miyawaki method in India is very beneficial.
What is the miyawaki method? Briefly explained
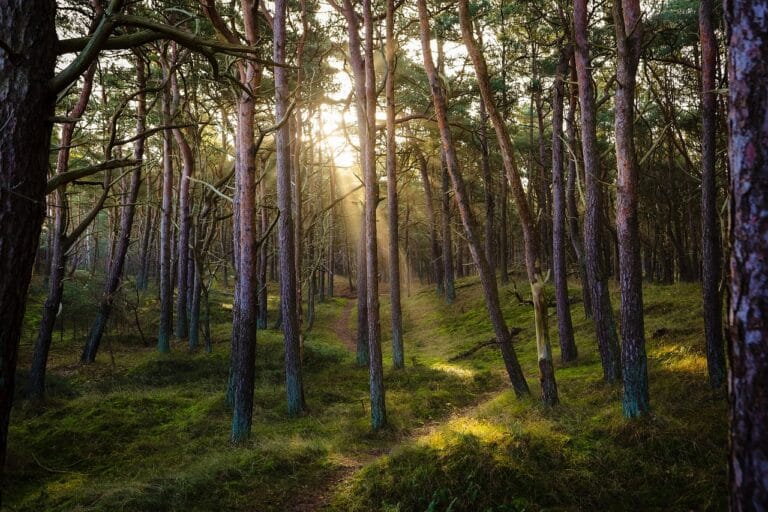
In recent years, a walkie method in India has gained popularity due to its ability to fight urban pollution. The Miyawaki technique was introduced by Japanese botanist Dr. Akira Miyawaki. Under this technique, native trees are grown in dense clusters to rapidly grow a micro forest in India, even in small spaces.
Table of Contents
ToggleHow to grow miyawaki forest : micro forest in india step by step guide
The Miyawaki method in India is gaining wider popularity because it allows homeowners, gardeners, or any urban planner to grow a micro, self-sustaining forest within a few years. This method is different from traditional afforestation. Whether you have a backyard or a school campus area, here is how to do this.
1. Identify a suitable space
The Miyawaki method does not require a large field, so even a 10×10 ft area can support a well-sustaining micro forest. If you are confused about choosing an area, here are a few examples– vacant society corners, school grounds, government parks, backyard plots, and roadside buffer zones. And one thing makes sure that the area you select receives 6-8 hours of sunlight and doesn’t have any underground pipes or concrete because it will resist root enlargement.
2. Clean and prepare the land
And you find out the perfect place according to you the next step is to clean the area. Remove cement debris, plastic, stones, and weeds. Also, remove the top dry soil layer if it’s hard-packed. Then dig down about 3 feet roughly 1 meter so that root can penetrate.
3. Improve soil quality with a natural additive.
Healthy soil is the fuel of your forest’s engine, but don’t mix artificial, excessive fertilizers. You can mix soil with organic compost from kitchen waste, cow dung, and leaf mold. Mix Cocopeat or sawdust to retain moisture. Add biomass rice husk, dry leaves, or sugarcane bagasse. Neem cake or bio fertilizer is useful to prevent pests. Let the soil rest 3-7 days before planting
4. Choose a mix of native tree species
Pick species that naturally grow in that area. They can adapt better they don’t require much care, and they can attract local birds and pollinators. Density tip: 3-5 saplings per sq. Meter. Create a four-layer forest structure:-
- Canopy tree – Neem peepal Banyan
- Tree layer – jamun amla bael
- Sub tree layer- amaltas kadamba guava
- Shrubs/ ground layer – Hibiscus, curry leaf, lemon grass.
5. Plant randomly
One of the key features of miyawaki forest is that, under this technique, the plants are randomly planted, not in a single line. It gives a Vibe of a natural forest. You must plan 3-5 saplings per square metre. Species should be mixed with different heights and growing speeds.
- This increases healthy competition between plants
- Dense planting also shades the ground, retaining soil moisture and preventing weeds from growing.
- It mimics a natural forest. The mixture of fast and slow-growing native plants.
6. Add mulch to cover the soil
After planting, cover the soil with thick mulch like dry leaves, sugarcane husk, coconut coir, or straw agriculture waste. Mulching helps in retaining soil moisture, regulating temperature, suppressing weed growth, and boosting microbial activity, which helps in plant growth. Remember that you don’t have to use plastic or synthetic mulch; always use biodegradable mulch.
7. Water regularly for the first 1 – 2 years
Don’t forget that you are establishing a whole forest. Under the Miyawaki method in India. You have to give a proper supply of water during the initial phase, at least until the roots settle down deep in the ground. Water 2 – 3 times a week in summer and once a week during cooler months. After two years, plants become self-sufficient and do not require manual watering.
Disadvantages of miyawaki method
1. High initial investment for small plots. If you are covering only 50-100 sq.m, the cost shoots up. And due to this reason, this becomes unaffordable for low-income individuals or communities without any external support.
2. Heavy maintenance in the first 2 years. Forest requests intense maintenance during 18 – 20 months. Proper and frequent watering, weeding, and protecting saplings from grazing animals are very important. And hence it becomes labour-intensive.
3. Not ideal for water waste. Miyawaki forest is dense, and a growing dense forest means higher water demand. This becomes a barrier in air zones or drought-prone cities. Sustaining this method without proper care can backfire.
4. Space may look crowded or unclean. Miyawaki forests are not grown in any order; they are grown completely in a natural pattern. And because of its wild and natural looks, it becomes untidy or unmaintained in some cities. It affects the ornamental landscaping.
5. Lack of genetic diversity. Miyawaki forest uses native plants. Some miyawaki projects use only 15-20 species in bulk due to availability, which defeats the purpose of restoring rich biodiversity. Only truly local sourcing can ensure ecological value.
6. If community ownership is lacking, the forest will fail. Many micro forests fail within a year. Saplings are stolen, nobody waters the plant, sapling waste is dumped there, and many more problems. Community involvement is not optional it’s the backbone
How much cost is required for miyawaki forest
Creating a Miyawaki micro forest in Indian cities looks very expensive, right? But that’s not the complete truth. It’s more flexible and scalable than most people think. The cost depends on various factors like soil quality, location, and whether you are doing it with the help of community labourers or hiring professionals.
| Size of Land | Approximate Cost (INR) | Notes |
|---|---|---|
| 100 sq. m | ₹30,000 – ₹60,000 | Small community or park corner project |
| 500 sq. m | ₹1.5 – ₹3.5 lakh | School, housing society, or NGO-led effort |
| 1000+ sq. m | ₹3 – ₹7 lakh | Larger city projects (reduced cost per sq. m) |
Real life success stories of miyawaki forest.
Noida park transformation
In Noida Sector 91, within just 2 years, a barren Park strip was converted into a dense forest by the miyawaki method. Over 300 plants like Arjun, neem, jamun, and peeple were grown 2-3 meters tall. They help in attracting native birds and reducing the urban heat island effect. But this was not done by a single individual; it was led by the local community and supported by the Noida authority. The cost was around 1.5 lakh Rs. For a 150 sq m area. During peak summer, the local temperature dropped by 2°C.
SayTrees Foundation’s Urban Forest in Bangalore.
Saytrees is an NGO that has pioneered over 50+ micro forest in Bangalore. One project near Kundalahalli lake turned a damp side into a dense micro forest of around 600 sq.m with 2400 saplings and 35+ native plants. In just 14 months many trees were taller than their planters. It is worth noting that they involve IT professionals, school kids, and elderly residents to build an inner touch with the forest.
Warje Urban Forest in Pune
It is one of the most cited Miyawaki case studies in India. The forest department with NGO’s support revived a 16-hectare barren land in Warje, Pune, by using the Miyawaki method. Over 23000 saplings were planted creating a thriving oxygen-rich zone. This project also created a biodiversity hotspot with butterflies, snakes, mongooses, and over 40 species of birds.
Mumbai’s Aarey Milk Colony
In Mumbai’s Aarey Colony, due to the metro, trees were being cut down, and this led to a controversy in that area. The local community in the colony decided to start a community-led miyawaki forest. In small plots (80-120 sq.m) the planted local native plants according to the miyawaki method like – Bahava, kadamba and karanj. This community was not even supported by government funding, they collected donations and established a whole forest. It gives a strong message that even under pressure, nature can still fight back if the community is United.
There are many successful stories related to micro forests, and I have discussed a few. Overall, the aim was to tell you that even in the most polluted cities, a micro forest can reclaim the Barren land. You don’t need acres of land you just need action and support.
Common doubts and final thought
FAQs
Before establishing the Miyawaki forest, you might have some doubts, right ? Let’s clear them.
How much space do you require ? You can start with just 30-50 sq.m, even narrow strips along parks can be transformed. Plant 3-5 saplings per sq.m.
Do you require government permission? If you are planting your micro forest in your private land, then you don’t need permission. But if you are planting in public lands like parks or footpath edges you need approval from local authorities.
Can the Miyawaki forest survive in an extremely dry climate ? Of course, yes, but only if you choose native plants that are adapted to your area’s environment. If you are in Rajasthan use khejri or Babool.
How do I know which species to plant in my area ? Contact your local forest department or agricultural universities to find out what naturally grows in your area.
Stay tuned and if you want to know about